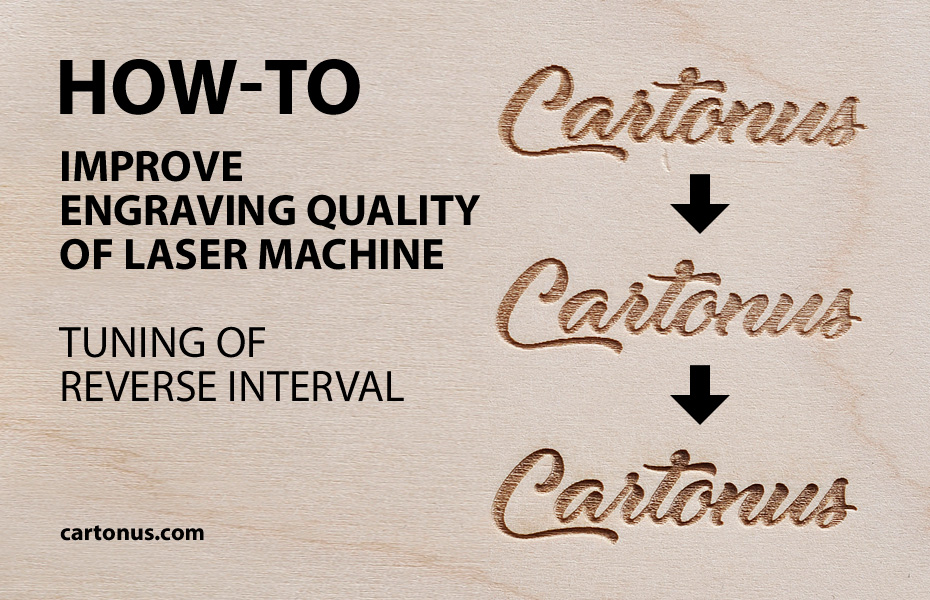
If you want to improve engraving quality of your laser machine, try a simple setup procedure – adjust Reverse Interval.
Step 1: Initial Data
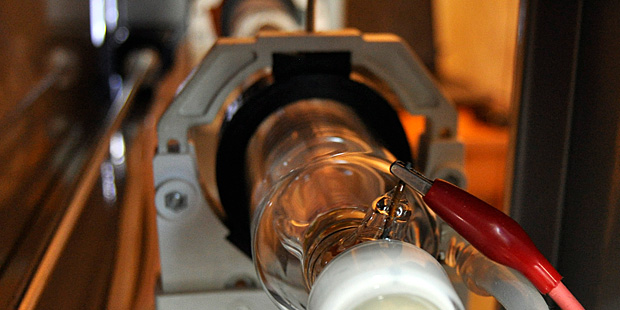
- Chinese laser machine
- Table: 500×300 mm
- Laser tube: 40 watts
- Program: RDWorks
Step 2: Engraving Parameters
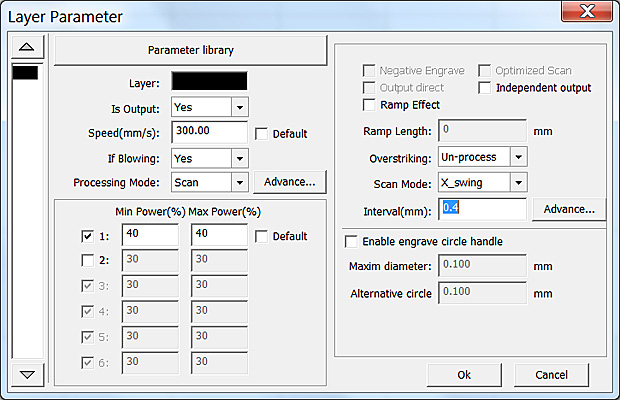
Run laser cutting program and draw small square with sides 10×10 mm.
Set engraving parameters
- Processing Mode: Scan
- Power (%): 30-40 (For 40 watt laser)
- Speed (mm/s): 300
- Interval (mm): 0.4 (This interval allows you to distinguish between engraved lines)
Engrave the image.
Look at the square with a magnifying glass. If even and odd lines do not dance and lines are aligned horizontally – then everything is fine. Otherwise, go to next step fot settings.
Step 3: System Setting
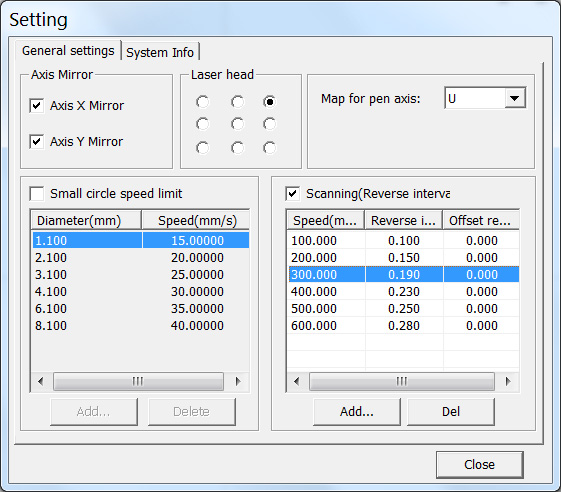
Open System Setting window: Config > System Setting > General Settings
Set Scanning (Reverse Interval) check box.
Add the following string values
- Speed (mm/s): 100 | Reverse Interval (mm): 0.10
- Speed (mm/s): 200 | Reverse Interval (mm): 0.15
- Speed (mm/s): 300 | Reverse Interval (mm): 0.19
- Speed (mm/s): 400 | Reverse Interval (mm): 0.23
- Speed (mm/s): 500 | Reverse Interval (mm): 0.25
- Speed (mm/s): 600 | Reverse Interval (mm): 0.28
These values are valid for our particular machine instance. You may have other values.
Step 4: Square
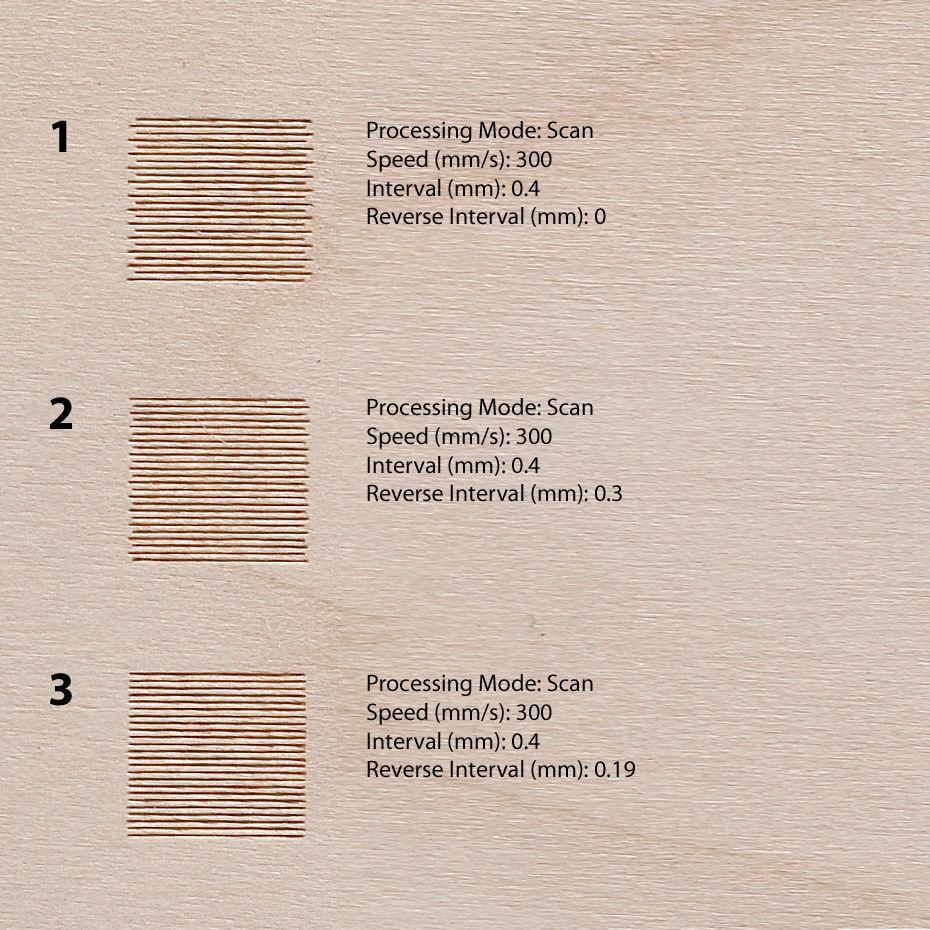
If even lines (second line) are to the left of odd lines (first line), increase the value of Reverse Interval (Figure 1), otherwise reduce (Figure 2).
Adjust values for the Reverse Interval and engrave the square until the lines will align horizontally (Figure 3).
Do the same for all engraving speeds that you use.
Step 5: Vector Logo
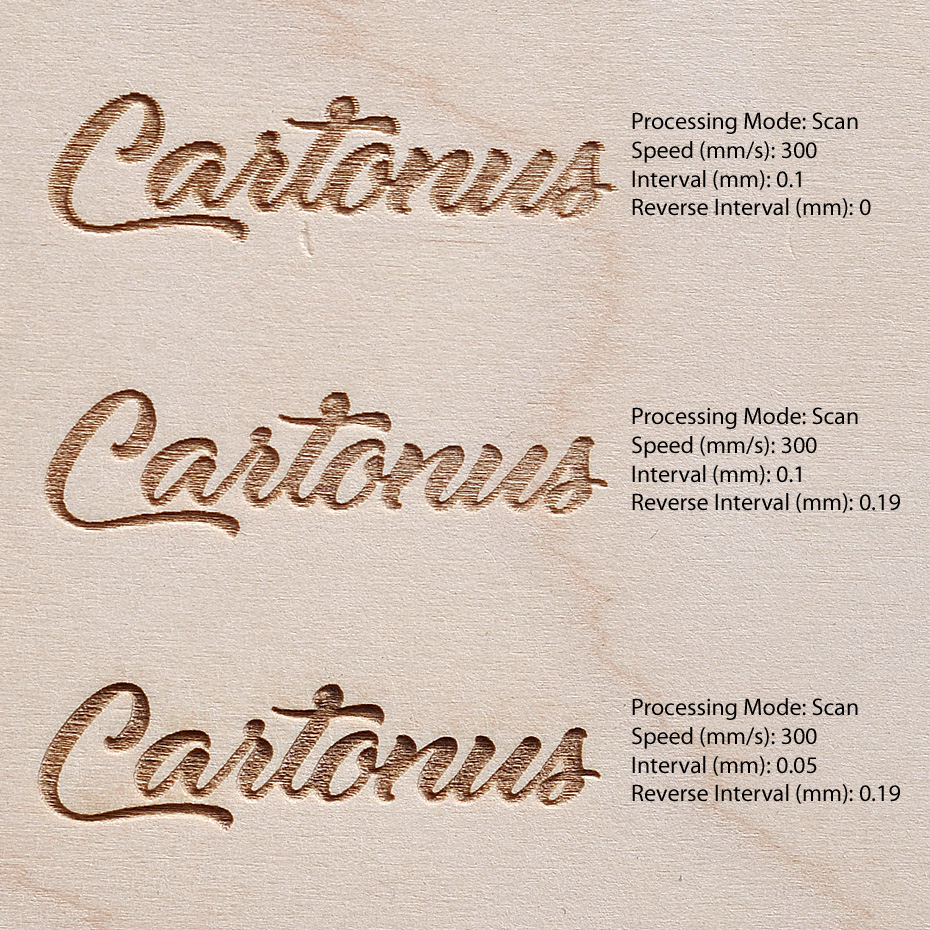
Look at the quality of engraving of the vector cartonus logo
- Without adjustment Reverse Interval
- With the correct setting Reverse Interval and the value of Interval (mm): 0.1
- For better engraving, set the value to Interval (mm): 0.05
Step 6: Wood Luck!



No responses yet