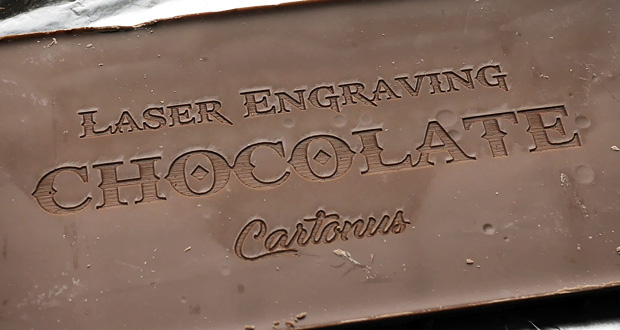
How-to: Laser engraving chocolate
Take good milk chocolate bar. Open wrapper. Measure dimensions of chocolate bar and create graphic layout according to those dimensions. Place chocolate bar with opened[…]
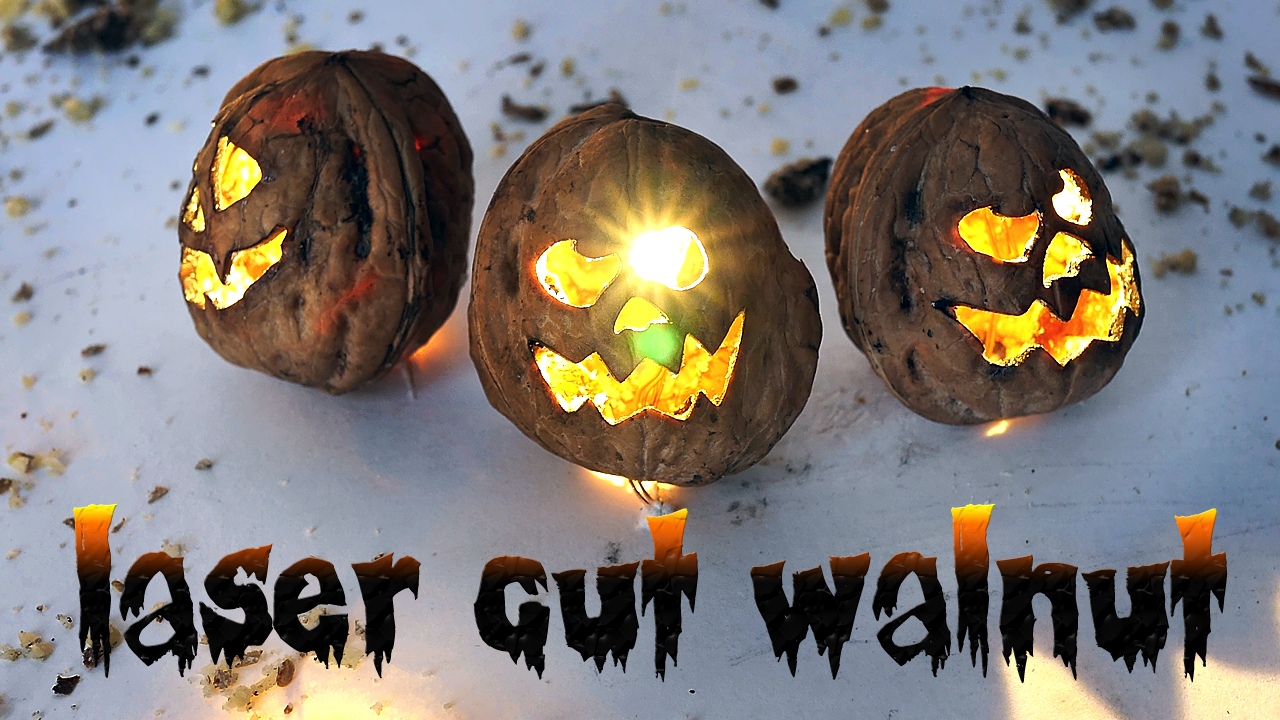
Laser cut walnut
In this instruction, we will show you how to make luminous head for Halloween from ordinary walnut using laser machine, screwdriver and light bulb. Let’s[…]

How-to: White Engraving
White engraving or inversion engraving. Objectives To obtain white engraving, you must remove thin dark layer of the coating from product and prevent charring of[…]
How-to: Wooden badge with safety pin
Instruction. How-to make wooden badge with safety pin Step 1: Cut and engrave Cut and engrave badge using laser mashine. Material: Birch plywood. Red line[…]
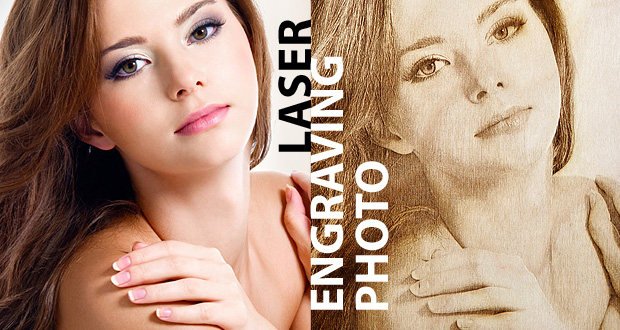
How-to: Laser engraving photo
I want to tell you how we engrave photos on a laser machine. After various tests, trial and error, born algorithm that allows you to[…]
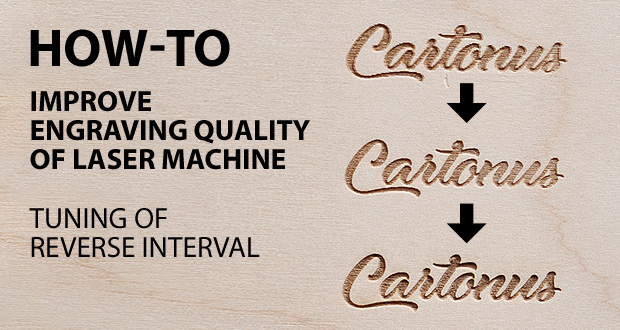
How-to: Improve engraving quality of laser machine
If you want to improve engraving quality of your laser machine, try a simple setup procedure – adjust Reverse Interval. Step 1: Initial Data Step[…]
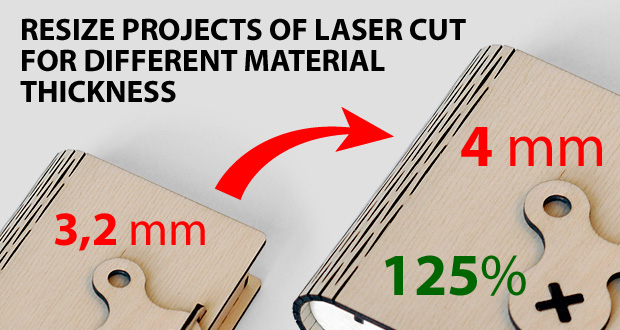
Resize projects of laser cut for different material thickness
How to resize project plan of laser cut for different material thickness We make projects mainly for 3,2 mm (1/8 inch) material thickness. But you[…]